


Creating your first map animation
Every map animation is built from the same four ingredients: destinations, the routes that connect them, a camera that moves between them, and a map style that sets the mood. Get those four right and even a two-stop trip reads like a story rather than a screen recording of a map. The best first project is deliberately small: one origin, one destination, one route. You will learn more from finishing a simple animated map than from abandoning an ambitious one.
Mappi is a browser-based map animation tool, so there is nothing to install. Open the Mappi editor and you will see the Destinations panel on the left with a search bar at the top, powered by Google Places. It accepts place names, street addresses, and even raw coordinates.
- Add your destinations. Type your starting point into the search bar and select it, then repeat for your endpoint. Each stop appears in the Destinations panel in order.
- Connect them with a route leg. Mappi links consecutive destinations automatically. Pick a route type for the leg: Fly-over for a curved arc, or Driving to follow real roads.
- Preview the movement. Press play in the preview window. Watch how the camera flies from the first pin to the second, and adjust the route speed if it feels rushed.
- Export your video. Open the Export panel, keep the default 16:9 aspect ratio and 1080p resolution, and render your MP4.
That whole loop takes about five minutes, and it is the foundation every other tutorial on this page builds on. Once the loop feels comfortable, add a third destination and mix route types.
Read the full guide: How to Make a Map Animation (Step by Step)
Animating routes: flights, drives, and walks
The route type you choose changes how the journey feels. A Fly-over leg draws a clean curved arc between two points, which reads as fast, cinematic travel: ideal for country-to-country hops where the road itself does not matter. A Driving leg follows real roads, so the line bends with every highway interchange, and that texture is exactly what makes a road trip video feel authentic. Walking legs do the same at street scale, and Ocean legs trace shipping-style curves across water for ferries and cruises.
A good rule: use Driving or Walking when the path is the story, and Fly-over when the destination is the story. A coastal drive down Highway 1 deserves a Driving leg with a slow camera. Twelve European cities in forty seconds deserve Fly-over legs, because nobody needs to see twelve motorways.
In the Mappi editor, each connection between destinations is a route leg with its own settings:
- Select the leg in the Destinations panel by clicking the connector between two stops.
- Choose the route type: Fly-over, Driving, Walking, or Ocean.
- Set the route speed in the camera settings so long legs do not drag. A cross-country Driving leg usually looks better compressed to a few seconds.
Mixing types within one trip is where routes get interesting: fly into the country, drive the scenic stretch, walk the last block to the restaurant. If you plan to animate GPS-accurate journeys regularly, our animated route map page covers what Mappi does with real road data in more depth.
Cinematic flight path animations
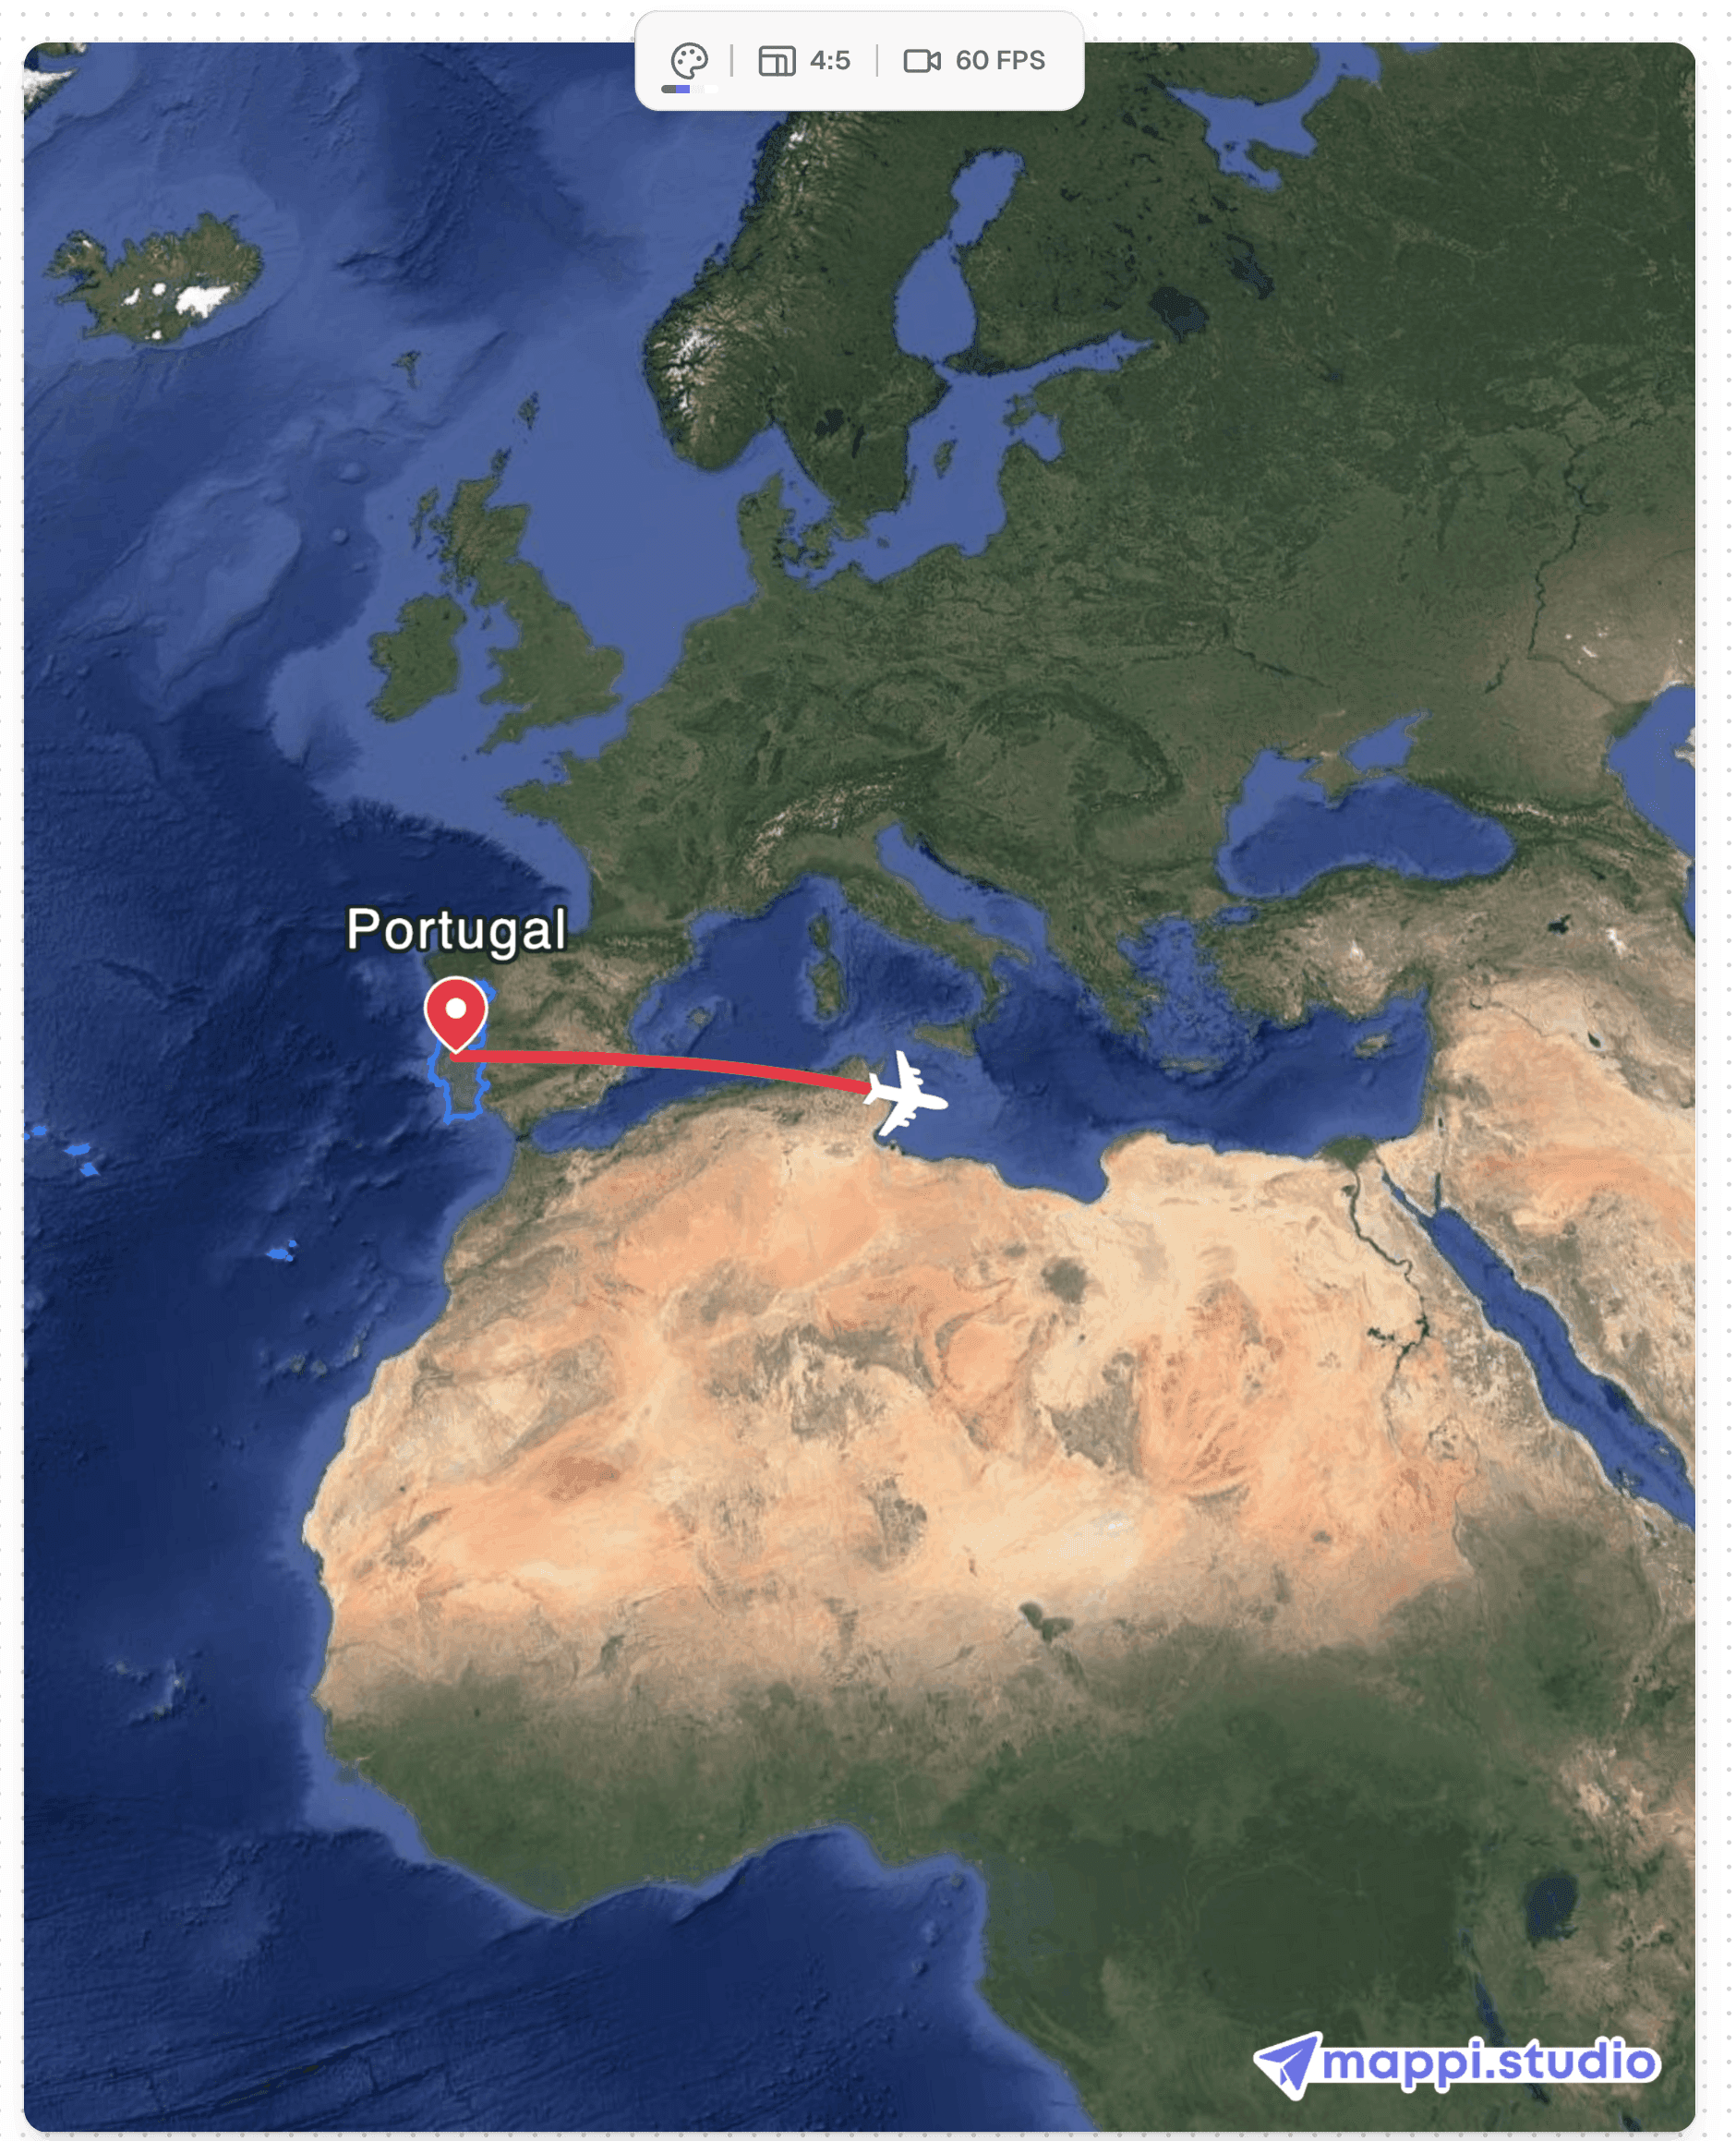
Flight path animations are the signature shot of travel content: the curved line arcing across a continent while the camera glides alongside. What makes one feel cinematic is not the line itself but the illusion of altitude. Real flights climb, cruise, and descend, and your camera should do the same. Zoom out as the route leaves the origin, hold a wide view over the long middle of the arc, then zoom back in as the line approaches the destination. That zoom shape alone separates a professional fly-over from a default one.
Here is how to build it in Mappi:
- Create the leg. Add both airports (the search bar accepts airport names and codes) and set the route leg type to Fly-over.
- Shape the camera. In the camera settings, lower the zoom level for the middle of the flight so the whole arc fits in frame.
- Ease the arrival. Set easing to Slow arrival so the camera decelerates into the destination instead of stopping dead. Smooth also works; Linear rarely does for flights.
- Tune the route speed. A transatlantic arc looks best at six to eight seconds. Shorter hops can land in three.
Resist the urge to show every flight in a multi-city trip at the same pace. Vary the speed and zoom between legs, and your sequence gets rhythm. For inspiration on how creators cut fly-overs into full itineraries, see our page on travel map videos, which pairs flight paths with on-the-ground segments.
Camera movement, zoom, and easing
Camera movement is the difference between a map that informs and a map that feels alive. Two principles do most of the work. First, easing: real cameras have mass, so they accelerate and decelerate rather than starting and stopping instantly. An animated map camera should behave the same way, or every transition feels robotic. Second, zoom discipline: every zoom should have a reason. Zoom in to say "this place matters". Zoom out to say "look how far we have come". A camera that zooms constantly says nothing.
Mappi exposes camera settings per route leg, which means every segment of a trip can have its own zoom level, route speed, and easing:
- Set the zoom level for each leg. City-to-city hops read well around a mid zoom; street-level detours deserve a close zoom so viewers see the neighborhood.
- Choose an easing curve. Smooth accelerates and decelerates symmetrically and suits most legs. Linear keeps a constant speed, useful for background loops. Slow arrival front-loads the speed and glides into the destination, the most cinematic option for endings.
- Balance route speed against easing. A fast leg with Slow arrival still lands gently. A slow leg with Linear easing feels like a screensaver.
One practical habit: preview every leg twice, once watching the route line and once watching only the edges of the frame. If the background scenery lurches or the map labels smear past too quickly, slow the leg down. You can see how experienced creators handle pacing in the showcase, where every example was built with these same three controls.
Read the full guide: Map Camera Movements: Zoom, Pan, and Easing
Choosing and customizing map styles
A map style is the wardrobe of your animation: it tells the audience what kind of story this is before anything moves. A dark style with muted roads reads as documentary or tech. A warm paper-toned style says travel diary. A high-contrast minimal style suits data stories and news. Choosing a style is therefore not a decoration step, it is a tone decision, and it is worth making early because it affects how visible your routes, pins, and labels will be.
Two properties matter more than anything else: contrast and hierarchy. Your route line and pins must contrast strongly with the land beneath them, and the map's own detail (roads, borders, labels) must sit visually below your content. If a viewer's eye goes to a motorway instead of your route, the style is fighting the story.
In Mappi, the Style panel handles both halves of this:
- Start from a preset. Pick the preset closest to your intended mood. Presets are balanced out of the box, so you are adjusting rather than building from zero.
- Adjust the base colors. The Style panel exposes custom colors for land, water, roads, borders, and labels. Nudge land and water first; they cover the most pixels.
- Check contrast against your route. Play the animation and confirm the route line pops at every zoom level, not just the one you happened to preview.
Save a style you like and reuse it across videos. Consistent styling across a channel does the same work a color grade does in film: it makes your animated maps recognizably yours.
Read the full guide: Custom Map Styles: Design a Map That Matches Your Brand
Highlighting countries, states, and cities
A route tells viewers where you went; a highlight tells them where to look. Animating a country or city outline is the strongest focus cue map animation has: the shape draws itself, fills, and instantly separates the subject from every neighbor. News explainers use it to isolate a country in a region. Travel creators use it to introduce each state on an itinerary. Data storytellers use it to define the area a statistic applies to before the number appears.
Restraint makes highlights work. One highlighted region at a time keeps the meaning sharp; three simultaneous highlights compete with each other and with your route. Fill opacity matters too: a strong border with a subtle fill keeps underlying cities and labels readable, while a heavy fill turns the region into a flat sticker.
The Highlight tool in the Mappi editor handles the boundary data for you:
- Search for the region. Type a country, state, or city into the Highlight tool and Mappi loads its official outline. No shapefiles, no GeoJSON.
- Style the outline and fill. Pick a border color that matches your route palette and drop the fill opacity until labels beneath it remain legible.
- Time the reveal. Trigger the highlight as the camera arrives, not before. The outline animating in sync with the camera settling is what sells the moment.
Highlights pair naturally with a zoom-out: reveal the outline close up, then pull back so viewers see the region in context.
Read the full guide: How to Highlight Countries, States, and Cities on a Map
Pins, labels, and custom icons
Pins carry the information a route cannot: which stops matter, what kind of place each one is, and what it is called. Treat them like typography rather than decoration. Every pin on screen is a word the viewer has to read, so a twelve-stop animation with twelve identical red markers is a wall of text. Vary pins by meaning: one style for overnight stays, another for sights, a custom icon for the finale.
In Mappi, every destination gets a pin automatically, and the Pins controls let you change what that marker says:
- Pick a pin style per destination. Select a stop in the Destinations panel and choose one of the pin styles, or upload a custom icon: a coffee cup for the cafe stop, a plane for the airport.
- Edit the label. The label defaults to the place name from search. Shorten it. "Tsukiji Outer Market" can become "Tsukiji" once the context is set.
- Check label size at your export zoom. Labels that look fine zoomed in can turn to specks at a wide zoom level. Preview the full animation and bump the label size if any stop becomes unreadable.
The reliable test is the pause test: stop the preview at any frame, and in two seconds you should know which pin the story is currently about. If not, remove a pin or dim the ones that already had their moment.
Read the full guide: Adding Pins, Labels, and Icons to Your Map Animation
Generating map animations with AI
AI is genuinely good at the part of map animation most people find tedious: turning a trip that exists in your head into a structured sequence of destinations, routes, and pacing. It is not there to replace your taste; it produces the first draft so your time goes into the decisions that make the video yours.
The AI Trip Builder in Mappi takes a plain-language description and produces a complete animated route. Describe the trip the way you would tell a friend: "Two weeks in Japan: fly into Tokyo, bullet train to Kyoto, day trip to Nara, ferry to Miyajima, fly home from Osaka." The AI Trip Builder resolves each place, orders the destinations, picks sensible route types for each leg (Fly-over for the flights, Driving or Walking for the ground segments, Ocean for the ferry), and sets a pacing baseline.
From there, treat the result exactly like a project you built by hand:
- Review the destinations in the Destinations panel and remove anything the story does not need.
- Adjust the legs where the AI guessed wrong: maybe that Kyoto transfer deserves a Driving leg for the scenery.
- Apply your style and camera polish. The Style panel choices and per-leg camera settings are still yours to make.
The workflow shines for long itineraries: a fifteen-stop trip that would take half an hour to enter manually is on screen in seconds.
Exporting in 4K
Resolution is a compounding decision: every platform re-compresses your upload, so the quality ceiling of what viewers eventually see is set by the file you give the platform. A 4K master survives YouTube's compression visibly better than a 1080p one, even for viewers watching at 1080p. Map animations benefit more than most footage because they are full of thin lines and small text, exactly the detail that compression destroys first.
Exporting from Mappi works like this:
- Open the Export panel and pick your aspect ratio: 16:9 for YouTube, 9:16 for vertical platforms, 1:1 or 4:5 for feeds.
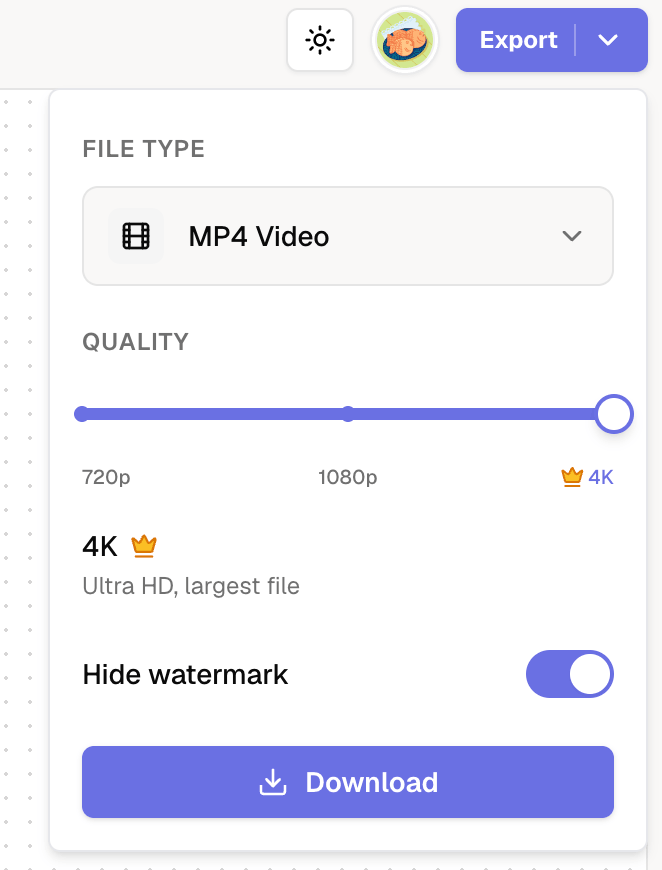
- Choose the resolution. 720p is fine for drafts, 1080p is the free default, and 4K is available on Pro. If the video contains street-level zooms or long label-heavy shots, 4K earns its render time.
- Render the MP4. Mappi renders in the cloud, so you can keep working while the video processes, then download the finished file.
Two habits save re-renders. First, watch the full preview at final speed before exporting; ninety percent of export regrets are pacing issues that were visible in preview. Second, export the master at the highest resolution you will ever need, then scale down for other placements. Downscaling 4K to 1080p looks crisp; upscaling 1080p to 4K never does. If you are weighing whether 4K matters for your channel, the pricing page lists exactly what the Pro plan unlocks, including 4K and watermark-free output.
Transparent exports for video editors
For video editors, the most useful map animation is often one with nothing behind it. A transparent export removes the map's backdrop so the animation can sit directly on your own timeline: over drone footage, on a branded background, inside a lower third, or as a corner overlay during a talking-head segment. This is why motion designers charge well for map inserts, and why a transparent toggle replaces an entire compositing workflow for most editing jobs.
The craft consideration is that a transparent map animation is a graphic element, not a full-frame shot. Design it like one:
- Simplify the map before exporting. Strip the style down in the Style panel; when the animation floats over footage, fewer roads and labels read better.
- Turn on the transparent background toggle in the Export panel. It is available on the Pro plan.
- Match your edit's frame size. Export at the aspect ratio and resolution of your project so the overlay drops in without scaling artifacts.
- Layer it in your editor. Import the file into Premiere, Final Cut, DaVinci Resolve, or CapCut and place it on a track above your footage.
Think about where the animation will sit in frame while you build it: if the map will occupy the lower third, keep the route action centered in that band, and run the pause test against actual footage rather than the editor preview. A drop shadow or a subtle dim layer behind the map helps it separate from busy footage.
Read the full guide: Transparent Map Animations for Video Editors
Sizing for TikTok, Reels, Shorts, and YouTube
Aspect ratio is a framing decision, not an export afterthought, because a map animation composed for a widescreen frame rarely survives a crop to vertical. In 16:9 you can let an animated route sweep left to right across a continent. In 9:16 that same route needs to travel vertically or stay tight, because the frame simply cannot hold east-west sweep. Decide the destination platform first, then build the animation inside that shape.
The platform cheat sheet:
- YouTube: 16:9, and export in 4K if the video leans on fine map detail.
- TikTok, Reels, and Shorts: 9:16. Keep pins and labels in the middle band of the frame; platform UI (captions, buttons, progress bars) eats the top and bottom edges.
- Instagram feed: 4:5 gets more screen area than 1:1, though square remains the safest crop if the post will be reused elsewhere.
In Mappi, the aspect ratio picker lives in the Export panel (16:9, 9:16, 1:1, 4:5), and the preview reframes immediately so you can check composition before rendering. When you need the same trip in multiple formats, build and polish the widescreen version first, switch the aspect ratio, then walk through each leg and re-check two things: that the route stays inside the frame at each leg's zoom level, and that no label sits in a platform's UI zone. Those two passes take minutes and are the difference between a native-feeling vertical video and an obvious crop.
Read the full guide: Map Animation Sizes for TikTok, Reels, and YouTube
Troubleshooting common issues
Most map animation problems trace back to a handful of causes, and almost all of them are visible in the preview before you ever hit export. Run through this list top to bottom before re-rendering.
- The camera feels choppy. Usually too much movement in too little time: a fast route speed combined with a large zoom change. Slow the leg down in the camera settings or reduce the zoom gap between consecutive legs, and switch the easing from Linear to Smooth.
- Labels are blurry or unreadable. The export resolution is doing the work your label size should. Increase the label size for wide shots, and export at 1080p or higher; text is the first thing lower resolutions destroy.
- The route hugs the wrong roads. A Driving leg follows real road data, so an odd detour usually means one destination pin sits slightly off, on a service road or inside a large complex. Re-search the destination with a more precise address.
- The export seems stuck. Renders run in the cloud, so keep the tab open on the progress screen, check your connection, and give long 4K exports a few minutes. If a render genuinely stalls, re-exporting at a lower resolution isolates whether length or resolution is the issue.
- The file looks worse after uploading. That is platform compression, not the export. Upload the highest-resolution master you have, ideally 4K, so the platform's re-encode starts from more detail.
If a problem survives all five checks, simplify: duplicate the project, delete half the legs, and re-test to isolate the leg that causes it.
Read the full guide: Map Animation Troubleshooting: Fix Common Export Issues

Still need help?
If your issue is not covered above, reach out and our team will help you get unstuck.
